Emergency Lessons – Scan All Family Photos

This article is one of a series of posts that emerged due to the 2017 wildfires that ravaged California wine country near our home.

In the aftermath of the 2017 Northern California Wildfires a local news site posted a poignant story showing scraps of photos salvaged from homes lost in the fires.  Human memory is frail enough, but when physical reminders are lost forever the past becomes more distant still.

Most cameras these days are digital and saving those photos off site is easy enough.  Photos on smartphones are portable and photos already stored on computers can be backed up online.  But older photos are another story.  Photos of the grandparents from 100 years ago tucked away in several boxes in the attic are probably irreplaceable.  Losing them to a fire forever is not something you should leave to chance.

You can include the most precious of photos as part of your go bag or filing case.  But you may very well have more photos that need to be saved than you can reasonably gather in a true emergency.  The solution is to make copies and store them offsite, preferably outside of the city in which you reside.

There are a couple of ways to go about making this happen.  Many printers these days have scanning capabilities built into them and most can scan photos with acceptable resolution for the task at hand.  If you have a printer/scanner already, the upside is that the process won’t cost you a dime.  The downside is that this process can be tedious and can take quite a bit of time depending upon how prolific your family has been with their cameras over the years.

There are options to trade off time for money.  Several companies exist to digitize your photos and even home movies.  The cost for these services can be pricey.  Depending upon the vendor, the type of service package selected and the number of photos to be scanned the price can vary between $0.20 up to $1.00 to photo.  It pays to shop around and do the math if you plan on taking this route.

A possible benefit of the higher cost from scanning services is that many of them can also do some cleanup of scratches or other imperfections.  The amount of damage that can be undone is not infinite, but scans of older photos may come out looking much more crisp and clear than the original.

Once your photos are scanned it’s imperative you ensure they remain safe.  Sitting on a single computer in your home does not increase the safety of your family memories.  Now is the time to back up those photos on your computer using one of the automated backup services mentioned in a previous article or using an alternative storage service such as Google Photos.  Placing them online also opens up the possibility of sharing them with other family members who may be able to fill in missing details such as who the handsome guy that’s obviously not Grandpa hugging Grandma in 1913 is.

As you look through family photos spanning multiple generations and recall the stories behind them you better understand the many difficulties they faced in life and somehow survived.  By scanning all family photos so they survive regardless of the emergency you face you’ll help ensure that future generations retain those stories and mementos.

Posted in Emergency | 1 Comment

Emergency Lessons – Backup Your Computer To The Cloud

This article is one of a series of posts that emerged due to the 2017 wildfires that ravaged California wine country near our home.

More and more of our daily lives are recorded and tracked on our personal computers.  In an emergency situation the family TV can easily be replaced if it is lost without much of a fuss.  In fact, the TV you buy as a replacement will likely be better than the one it replaced.

One could make the same argument for the family computer as well.  But the data on that computer is another story altogether.  In some cases the data on that computer is irreplaceable.  It a fire destroys your house and takes the computer with it, all of the data it contained is lost for good.

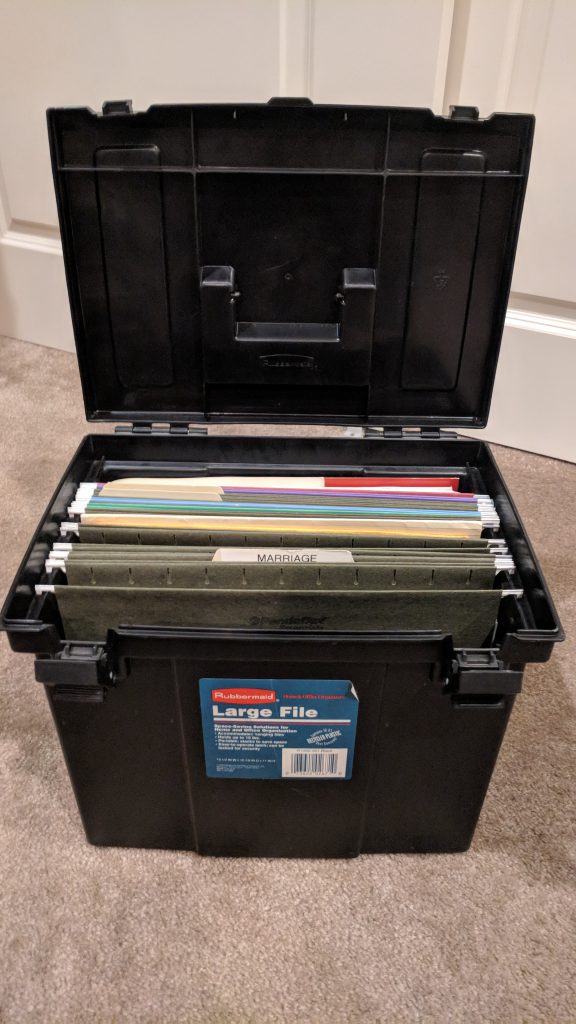
Unless you make copies of that data.  Businesses have known about the importance of backing up their data for decades now.  Individuals can do the same by performing periodic dumps of their data onto another hard drive.  But there are some security holes in this strategy.

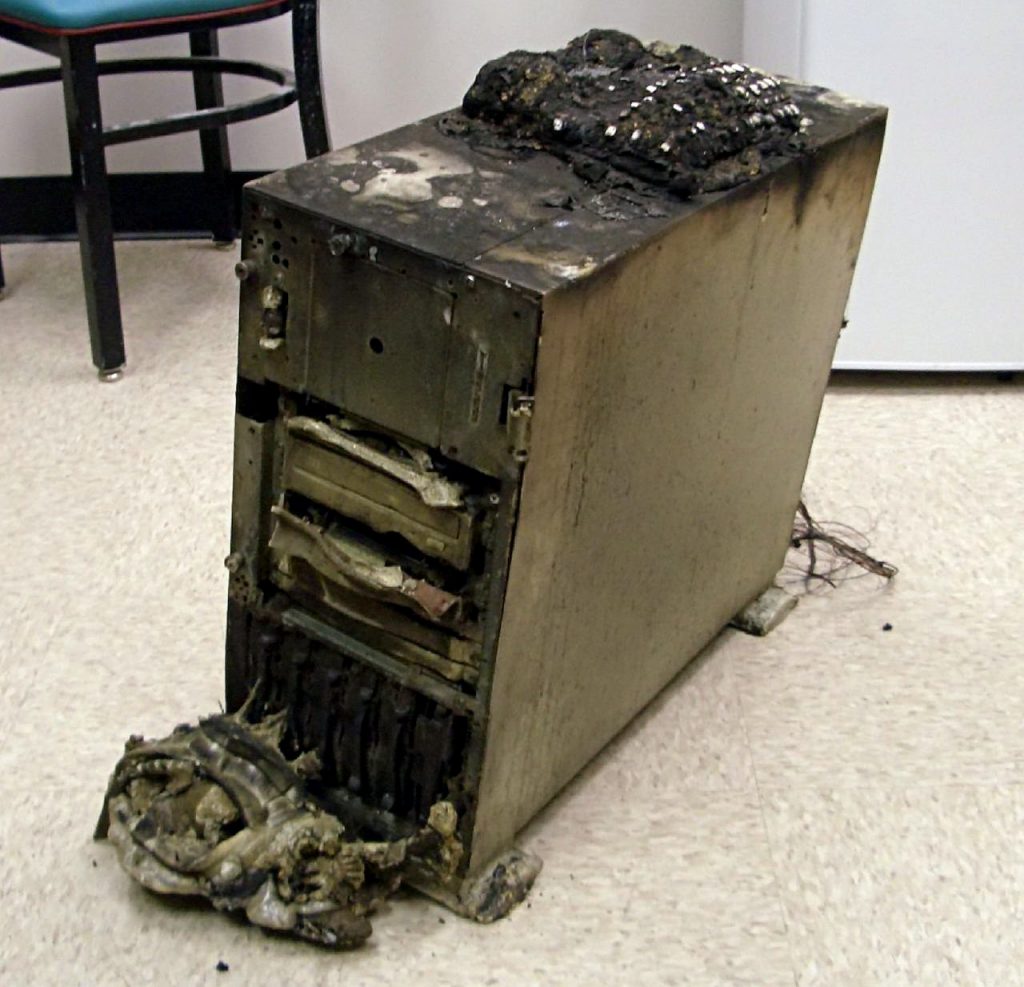
What do you do with the backup you created? Store it in the closet at home?  That’s fine for a hard drive failure.  Maybe even theft of the computer, assuming the thieves didn’t empty your closet.  But what if your house burns down and you forgot to take the backup drive with you?

Or, what if you got tired of the process of backing up your computer again and again and put it off for six months or more?  Even if you grab the backup you’ll have lost six months of memories and work.

The only way to really ensure that your data is secure from both natural disasters (that would destroy your home) or your own procrastination (because backing up computers is really boring work) is to automatically back up your computers into the cloud.

Several companies have already worked out how to automatically mirror your computer’s files onto their servers silently and continuously.  Created a new project file for work or took photos of the kids?  Almost as soon as they hit your computer’s hard drive they are queued up to be uploaded safely offsite from your home.

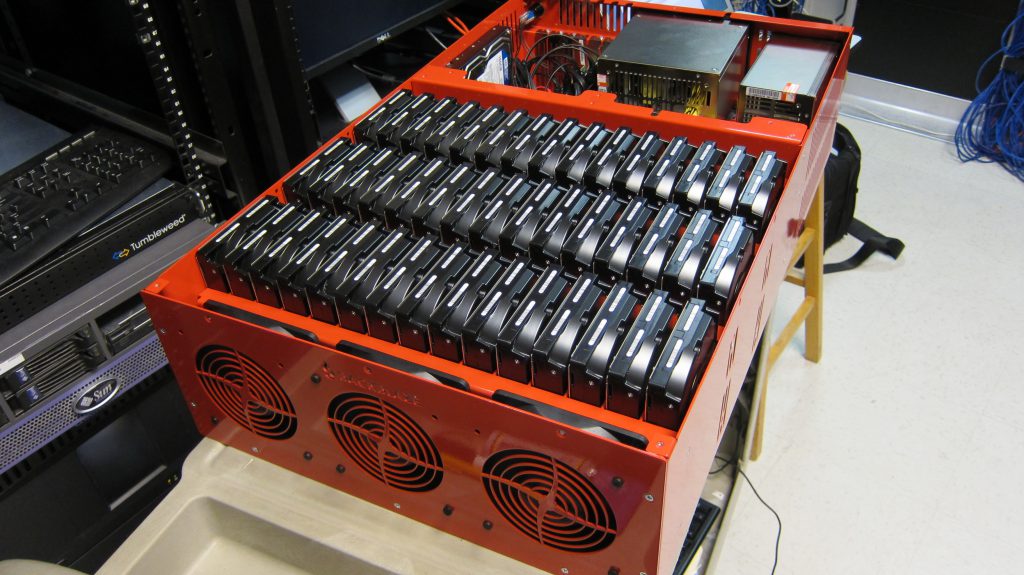
Generally, the backup services look for less busy times when your computer’s on to package up files that have recently been updated, encrypt them for your privacy and uploads them to server farms for the ultimate protection of your data.

There have even been cases where backup software has been used to track down lost or stolen laptops.

I personally use BackBlaze and have been very happy with it.  Carbonite and iDrive are two others that provide similar services.  Prices in a nutshell run at about $5 a month.  When you consider how much time you might spend per month setting up a manual backup and moving that backup drive away from your house for complete safety, it’s a great bargain.

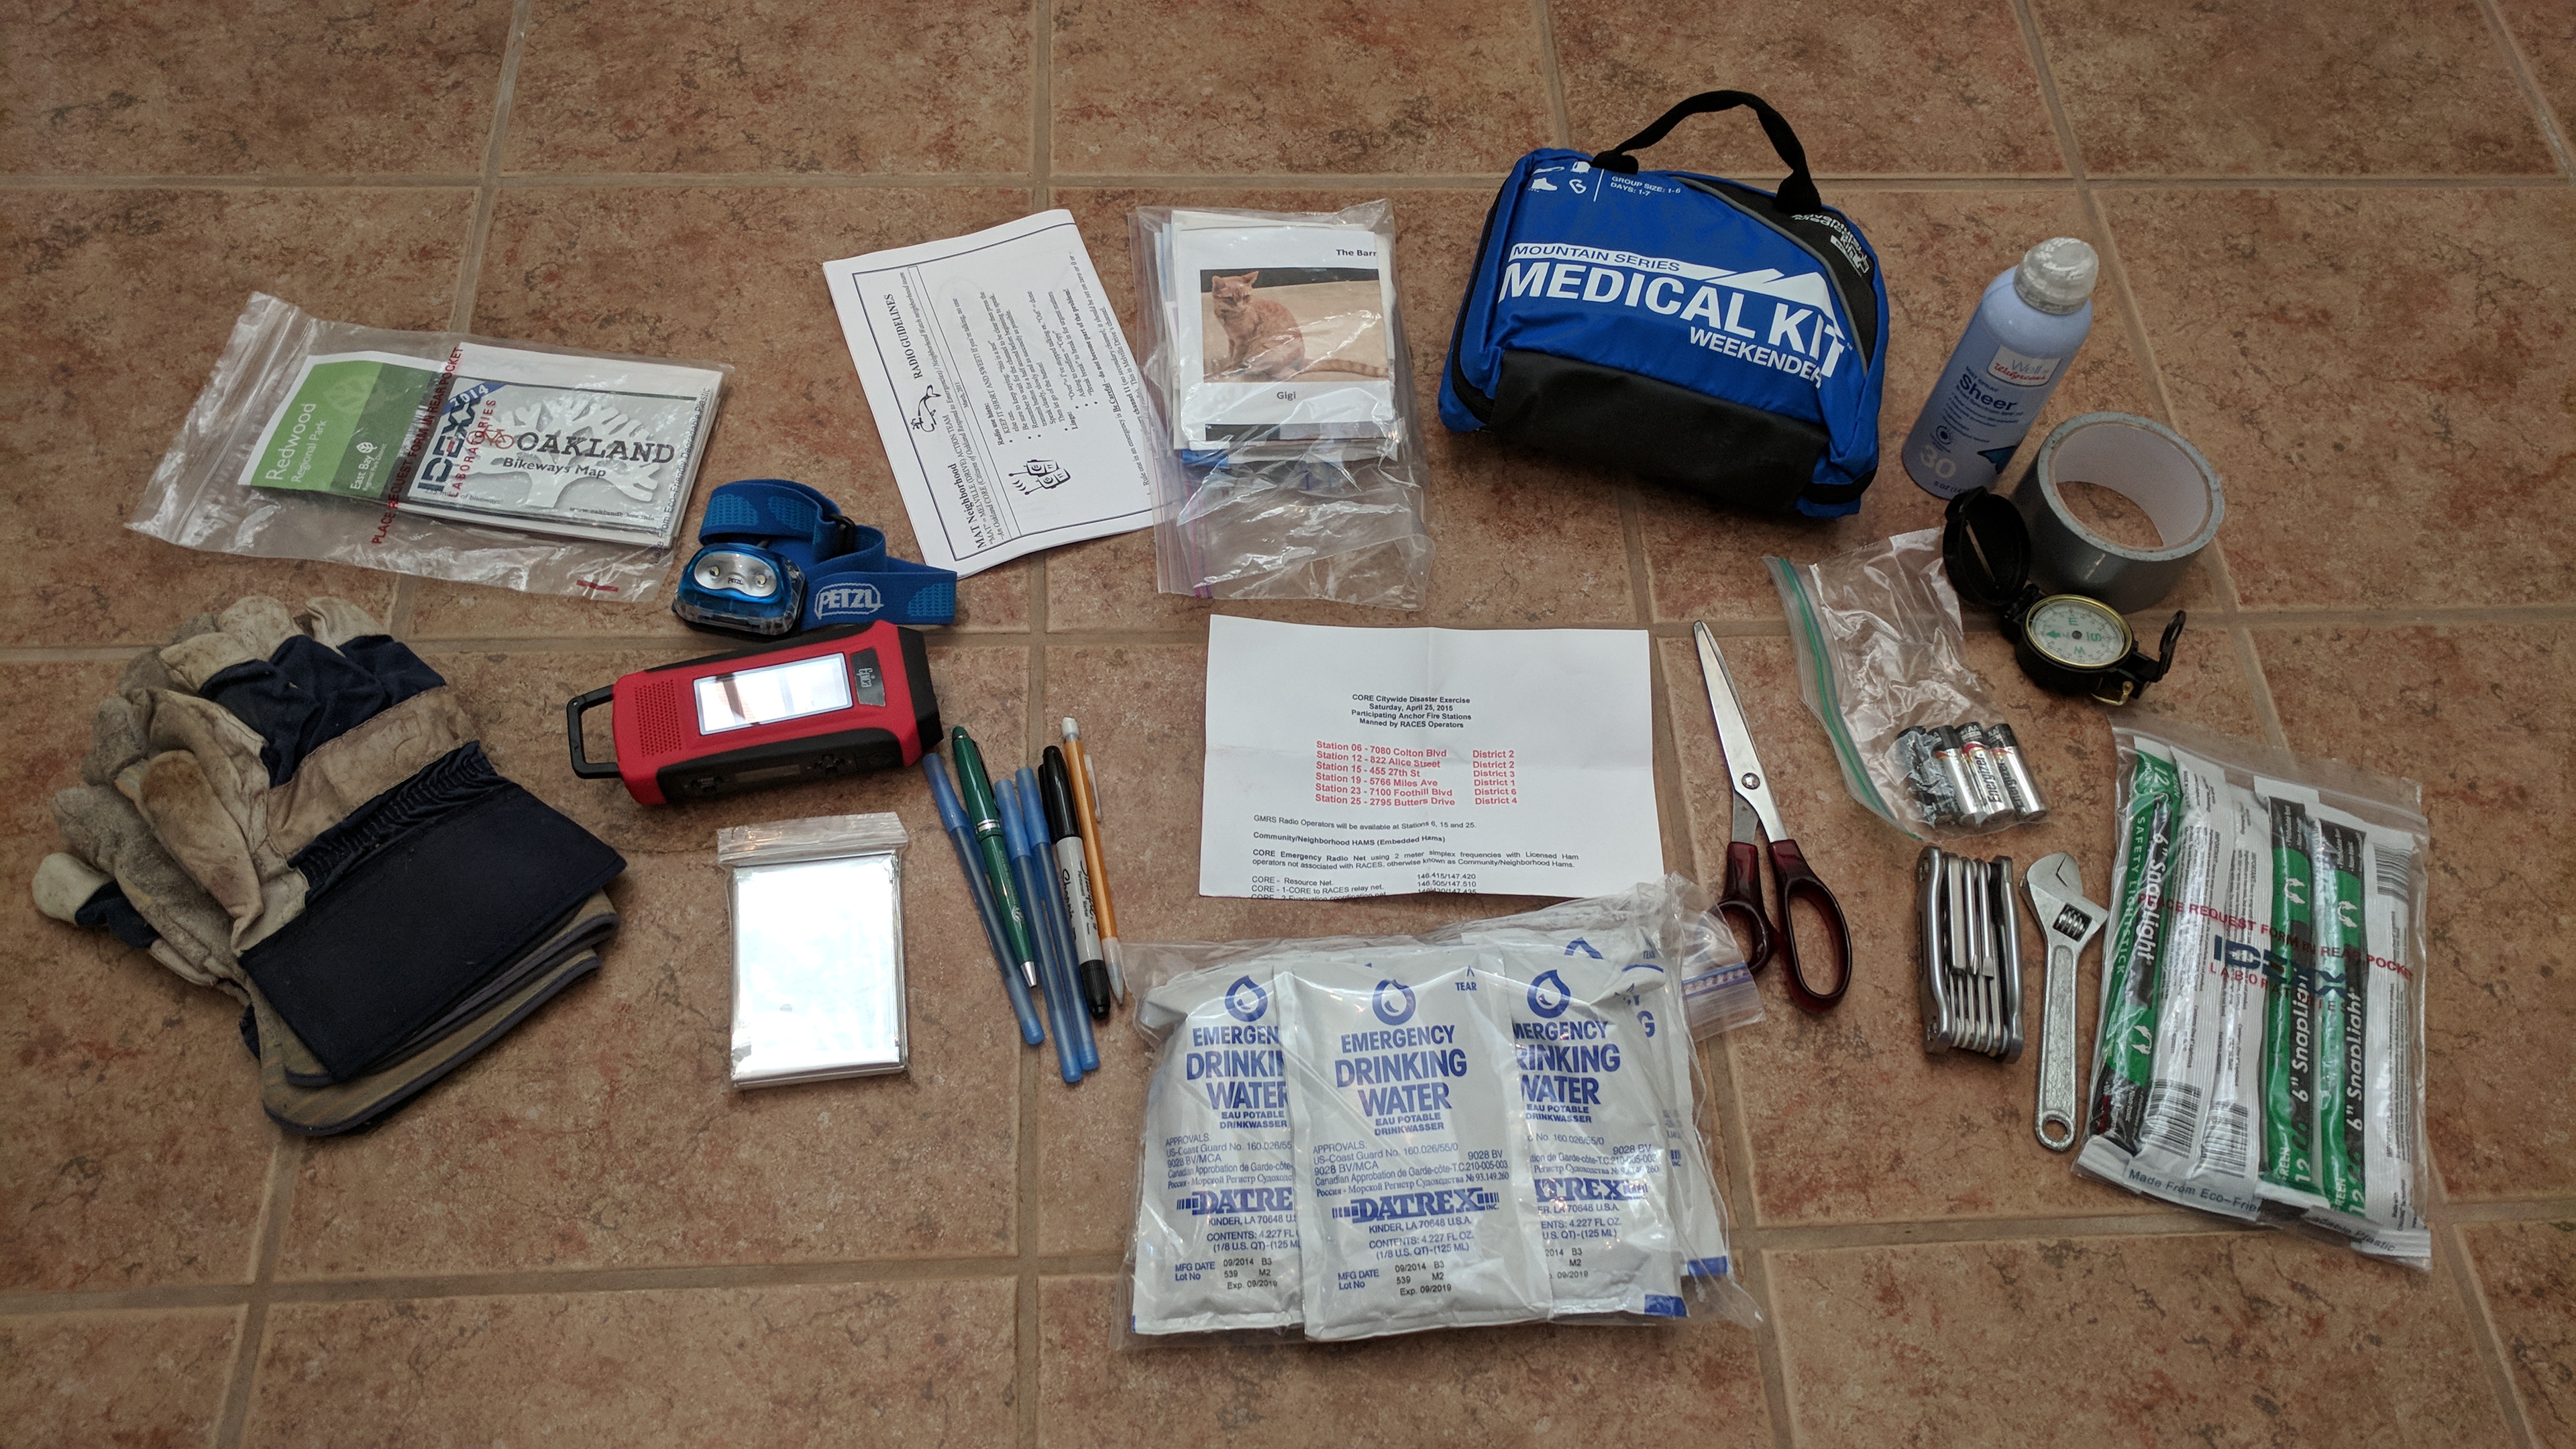
Need to leave the house on a moment’s notice?  Get a little more peace of mind knowing that your irreplaceable data has already been set up in a secure location miles away from the emergency threatening your home.

Posted in Emergency | 4 Comments

Emergency Lessons – Store Containers of Water

This article is one of a series of posts that emerged due to the 2017 wildfires that ravaged California wine country near our home.

Not all emergencies call for getting out of town fast.  In some cases the emergency is more of a shelter in place scenario.  That means ensuring you have many essentials handy for what might be an extended period of disruption.

One of those disruptive events might be a loss of municipal drinking water.  It’s even possible that a functioning water system might be transporting water that’s unfit to drink, so having some good fresh water as an emergency backup is important.

If you have water delivered in 5 gallon jugs for a water cooler you’re already ahead of the game.  Having a few more full jugs queued up can provide a bit of a buffer until an emergency situation abets.

Your water delivery guy may wonder what you’re up to.

It’s important to make sure you cycle through those jugs in sequential order, using the older jugs first.

If you don’t get delivered bottled water or don’t want to mess with so many jugs there are some larger containers that can be used to store water on a longer term basis.  Twenty gallon plastic emergency water drums are a good balance between size and ease of movement.  No you won’t be carrying full containers, but they can be rolled around and tilted over fairly easily.  We have two such drums and bought them recycled at a discount.  The drums were used previously to transport soda syrup, so they had a bit of a rootbeer odor to them until we rinsed them and aired them out well.

With drums of water you’re not thinking of using them on a regular basis outside of an emergency.  You tend to fill them and then leave alone for extended periods of time.  How then do you ensure that the water doesn’t get unsafe?  I recommend using Purogene water treatment in the drums to ensure nothing unhealthy grows in the water over time.  According to the instructions on the bottle, 1 oz. of the product should be good for 30 gallons of water.

What does the water taste like with the added preservative?  I honestly don’t know.  I’ve never tried it.  But then, this water is intended to be used in an emergency when there is nothing else available.  Quick frankly, it doesn’t matter if it tastes good or not.  It just has to be safe.

How much water should you store per person?  Well, that really depends on how long the emergency lasts and how many people you need to keep hydrated.  So, it depends.  For my wife and I we maintain two 20 gallon drums of water in the garage in addition to the smaller emergency punches of water that are in our go bag.

Posted in Emergency | 2 Comments

Emergency Lessons – Segregate Important Documents

This article is one of a series of posts that emerged due to the 2017 wildfires that ravaged California wine country near our home.

When one has to evacuate in an emergency that is not the best time to decide on what’s most important and what can be left behind.  The Go Bag I discussed in a previous post touches on this for items related to health and safety.

Important papers and documents should also be placed in an easy to reach spot so they can be grabbed in an instant.  What sort of documents are considered important?

  • Birth and marriage certificates
  • Drivers Licenses (of course these should be in your wallet or purse)
  • Insurance Policies
  • Passports
  • Pet ID
  • Prescriptions (You and your pet)
  • Real Estate Deed
  • Recent Tax Returns
  • Social Security Cards
  • Stocks, bonds or negotiable certificates
  • Wills

I recommend that many of the items above be scanned and stored off site for additional safety, something that I’ll touch on in a future post.  However, copies of some of these important documents online is not good enough.  In an emergency you may not have access to a computer connected to the Internet, so having a hard copy of the items above might come in handy.

When an emergency hits there might not be enough time to flip through your filing cabinet, looking for the important items.  In order to be able to grab and go you can consider a plastic filing box, complete with a handle for easy transport.  Place the box in a closet near your filing cabinet and it’s ready to throw in the car at a moment’s notice.

Some of these documents are fairly sensitive and you might not want to leave them around in a handy “to go” container for someone who might break into your house.  If you keep such documents in a safe or a lock filing cabinet just be sure they are clearly segregated from other, less important, documents so that they can be grabbed in an instant without thinking and thrown into the car.

Posted in Emergency | 2 Comments

Emergency Lessons – Review Your Go Bag

This article is one of a series of posts that emerged due to the 2017 wildfires that ravaged California wine country near our home.

Having a Go Bag is an important tool in being prepared for an emergency situation.  Equally important is making sure your go bag is truly ready for anything that comes.  This means not just buying a bag from Amazon and stuffing it in the closet behind lots of junk.  On a regular basis you should break out the bag, empty the contents out and review what’s included, what’s left out and what needs to be replaced or repaired.

Penny and I have had a Go Bag for a couple of years now, thanks to an active neighborhood preparedness group in the Oakland Hills where we previously lived.  We put together our bag in part spurred by a friendly competition among neighbors to see who could come up with the best example.

The problem is, we had not reviewed what was in the bag since that time, perhaps 2 years ago or more.  Prior to reviewing it, I could not even be certain what was in it anymore.  Worse yet, there was some non-perishable food in there but one that had an expiration date that had long since expired.  This is not good planning!

After the wildfire scare in California Wine Country I opened our bag and and did an inventory and analysis of what we had and what we needed.  You can read more about all of the items in the bag in my previous post.  Here are most of the bag contents scattered:

When reviewing things here were the takeaways, discoveries and things added to the to do list.

Emergency Radio Issues

We have a cheap, but fairly nice emergency radio and light.  The hand crank means never having to worry about batteries.  A nice feature of the unit is that it could be used to recharge cell phones and other small devices.  First problem I discovered is that the adapters from their phone jack power output to USB were missing.  I found them in a closet upstairs later.  Second problem, even with those adapters, it didn’t work.  The connections and adapters are cheaply made and did not seem to output any power at all.  We have actually never charged anything with this device.

Takeaway: The moral of the story is to check everything, make sure it works and keep all applicable pieces together at all times.

Expiration Dates

Things don’t last forever.  While I did find our AA batteries were still potent enough, we earlier found that our non-perishable food was woefully out of date.  Slightly stale food in an emergency may be fine, but they were perhaps a bit beyond that.  Our sunscreen’s use by date is in the past.  It may still work, but it’s effectiveness may be lessened.

Takeaway: Check expiration dates on all items in your go bag.  Cycle out items nearing expiration dates and refresh with new items.  The water blister packs and chemical light sources have expiration dates too.  Those were fine in our bag.  They may not be in yours.

Irrelevant Information

In our previous home there was a fantastic emergency preparedness group and we had a wealth of good information about escape routes from the area, local shelter locations and 2-way radio frequencies for communication.  But this was for Oakland.  All of this is useless given our current location.

We correctly included copies of our drivers licenses and insurance cards in our go bag.  The problem is that both of our insurance policies had been switched to other companies by our employers.

Takeaway: Review documents in your go bag and update them to be relevant to your current situation.

Missing Things

Our recent experience with the wildfires brought to mind a few things we should add to our go bags.  The top item was N95 Masks.  When the wildfires broke out there was often heavy smoke in the air and going outside was irritating at best.  I was away on a business trip and bought some to take back home, where they were scarce or unavailable.

Takeaway: Check your Go Bag on a regular basis.  I set up a yearly reminder in my Remember The Milk personal organizer to ping me one year after I check our Go Bag.

Another important point is that your Go Bag should never be sitting behind piled up junk in your closet.  It should be easily visible so that it can be found and grabbed in an instant.

TL;DR

In a nutshell: Have a go bag ready and check it regularly.

Posted in Emergency | 1 Comment

Emergency Lessons – Have A Go Bag Packed And Ready

This article is one of a series of posts that emerged due to the 2017 wildfires that ravaged California wine country near our home.

A Go Bag (also known as a bug out bag) is one of the primary tools for emergency preparedness.  In a nutshell, a go bag is a prepared container that already includes everything a person or group of people would need to survive for a few days in the event of an emergency.

The details about what such a tool should contain is personal, but some items commonly included in descriptions of go bags are:

Many companies produce ready to use go bags that you can buy if you do not want to take the time and effort to create your own.  A few available on Amazon include:

We were never sure about some of the compromises inherent in some of the premade bags.  In particular, any food contained in the bags were likely not to be gluten free.  So we decided to create our own.  Here’s what our go bag looks like from the outside.  It’s just an older, unused day hike pack that we re-purposed for emergency preparedness.

And here are the contents spread about.  This was part of our exercise to determine what needs to stay in the bag and what needed to be changed:

Here’s the list of items I inventoried:

  • Water
  • Gloves
  • Emergency Radio/Charger
  • Copies of drivers licenses, insurance cards and contact info
  • Mylar Blanket
  • Pens, Pencils, Sharpie and Notepads
  • Maps
  • Headlamp
  • Snap lights
  • First Aid Kit
  • Sunscreen
  • Tools
  • Batteries
  • Duct Tape
  • Compass
  • Trash bag, tissue

See any possible issues with our go bag?  You should.  Some expired food we found during the fire had already been thrown out.  So that’s missing from the photo above.  That an a few other issues I’ll discuss in an upcoming post about checking and updating a go bag on a regular basis.

An important feature of a go bag is its readiness to be picked up and taken at a moment’s notice.  This implies two things.  First, it should be complete and ready to go.  There may not be enough time to gather up components when evacuation is warranted.  During the recent wildfires some residents had minutes to leave their homes before they were engulfed in flames.

Secondly, the go bag should be in an easily accessible location.  Deep in the back of a rarely used closet is not a good place for an item you have to grab immediately during an emergency.  Our go bag visibly sits in the main coat closet near our front door.

So, were we prepared?  Yes and no.  A follow up post will go over some of the issues with our go bag, some of which we’ve already hinted at.

Posted in Emergency | 4 Comments

Emergency Lessons Learned

Penny and I survived a bit of a scare with the 2017 wildfires in Sonoma and Napa counties.  The closest fire came within 2 miles of the house and some evacuations about a half mile away.  But we never had to leave and didn’t lose power at any time.  Unlike many in the area we were very lucky.

In our prior home in the Oakland Hills there was an active neighborhood group that promoted emergency preparedness as part of a city program set up following the devastating 1991 Oakland Hills fire.  Despite some of the prior planning and instruction we received about emergency situations there we were still a bit flustered when it came time to pack up the cars for a possible order to evacuate the area this time around.

Here are a few thoughts that came to mind during and after this scare.  Even in those cases where we had prior planning we found our preparation to be in some cases incomplete.  Each of the thoughts listed below will be linked to additional posts which dive into a bit more detail.

  1. Have a go bag packed and ready at all times
  2. Review your go bag on a regular basis
  3. Segregate important documents that need to leave with you
  4. Have several containers of water stored
  5. Backup your computer hard drive in the cloud
  6. Scan all family photos
  7. Never let your gas tank hover near empty
  8. Make a list, check it twice
  9. Photograph and/or video everything in your house
  10. Leave the lights on.  And a TV.
  11. Get to know your neighbors
  12. Don’t wait

Taking some time to do all of the following above doesn’t make one paranoid, it makes one prepared.  When we moved from the steep hills of Oakland into the core of a town on flat ground we figured the risk from wildfires to our home was practically eliminated.  The recent events in wine country has reminded us that we should never be complacent.

National Preparedness Month is over, but it’s always a good time to prepare.

Chances are you’ll never be faced with having to rely on any of the steps above.  But if that unlikely event does arise then being prepared allows you to act quickly without thinking and thus reducing stress in an emergency situation.

Posted in Emergency | 12 Comments

Updating PyCharm and JRE

When updating your Python IDE PyCharm to the latest version you might run into an issue on older machines.  It looks like PyCharm will helpfully install a 64-bit JRE, but not a 32-bit version, even if you opt to include both 32-bit and 64-bit startup shortcuts.

When trying to start 32-bit PyCharm after such an install you’ll get an error that looks like this:

But hold on.  You may not need to go out and search for and install a complete JDK to satisfy PyCharm’s needs.  A simple JRE will do and if you happen have an older version of Pycharm already installed on your machine you don’t need to download anything.

On my old Windows XP test VM I found a “jre” directory under “C:\Program Files\JetBrains\PyCharm 4.5.3\”.  Copy that directory into the new version’s location (“C:\Program Files\Jet Brains\PyCharm Community Edition 2017.2\” for me) and try again.

It worked.  No downloading and no new environment variable.

Posted in Programming, Python | Leave a comment

Coastal Rx

One of the nice things about living near the coast in California is there are options to be had when the temperatures get a bit high.  Highs in the 100’s in Austin, TX means you have to grin and bear it.  And hope that the AC doesn’t give out.

The Pacific Coast as seen from the Bluff Top Trail

In California, if the temperature gets above 100 in one of the valleys a drive to the coast can result in a 30-40 degree level of relief.  And that’s the prescription Penny and I took this past weekend when we went hiking near Gualala, CA.  The Bluff Top trail’s northern terminus starts in Gualala Point Regional Park and continues down for about 3.5 miles to Walk On Beach.  With some extra mileage thrown in we did more than 8 miles of hiking.

Penny looking down on one of the numerous small beaches along the trail, most of which are inaccessible.

It’s a bit of a drive, and in hindsight not one we’re likely to redo often for simple day trips.  Perhaps a weekend trip to more fully explore the area might be a better option.  Salt Point State Park is nearby, among others.

You can find more photos, and a map, of this outing on my Hiking Trailhead log page.


Posted in Uncategorized | Leave a comment

Taking Flight

For my recent birthday Penny decided to give me a gift of experience in the form of a flight over California Wine Country.  Vintage Aircraft at Schellville Airport offers rides on a number of vintage aircraft including biplanes, a T-6 Texan Trainer, P-40 Warhawk and even a P-51 Mustang.

Penny and me after our flight

In part because I thought the flight would be more enjoyable sharing it with Penny I opted for the 1942 Stearman open cockpit biplane, which allowed for side by side seating in the front cockpit.  That plane is almost as old as my Dad!

Our flight took us over southern Sonoma and a good deal of Marin counties.  We had the pleasure of flying over numerous vineyards, Sausalito, getting close to the Golden Gate Bridge, flying just under the peak of Mount Tamalpais, catching glimpses of wild deer darting over ridge tops and even circling over our house.

Our pilot, Chris, provided a silky smooth flight and to our great surprise the landing was perhaps the smoothest touchdown we’d encountered on any flight in a plane of any size.  Acrobatics are an option for flights here, but we opted for a more sedate outing this time around.

Great fun and a wonderful way to start the day.  We may have to pick another milestone in the future for a return visit.

This paper makes it official!

Posted in Family | Leave a comment